Organizing Music by Source Folder: Separating Old CDs from New Downloads
Most music collections have layers. There are the CDs you ripped years ago, the albums you bought online, the odd recordings a friend sent, maybe a pile of old tracker music or audio from videos. Putting them all in one giant folder is tempting, and also a good way to lose track of things. JahSing 3 lets you keep each layer in its own folder and still search across them all, or look at just one at a time. This guide shows you how.
The idea: sources
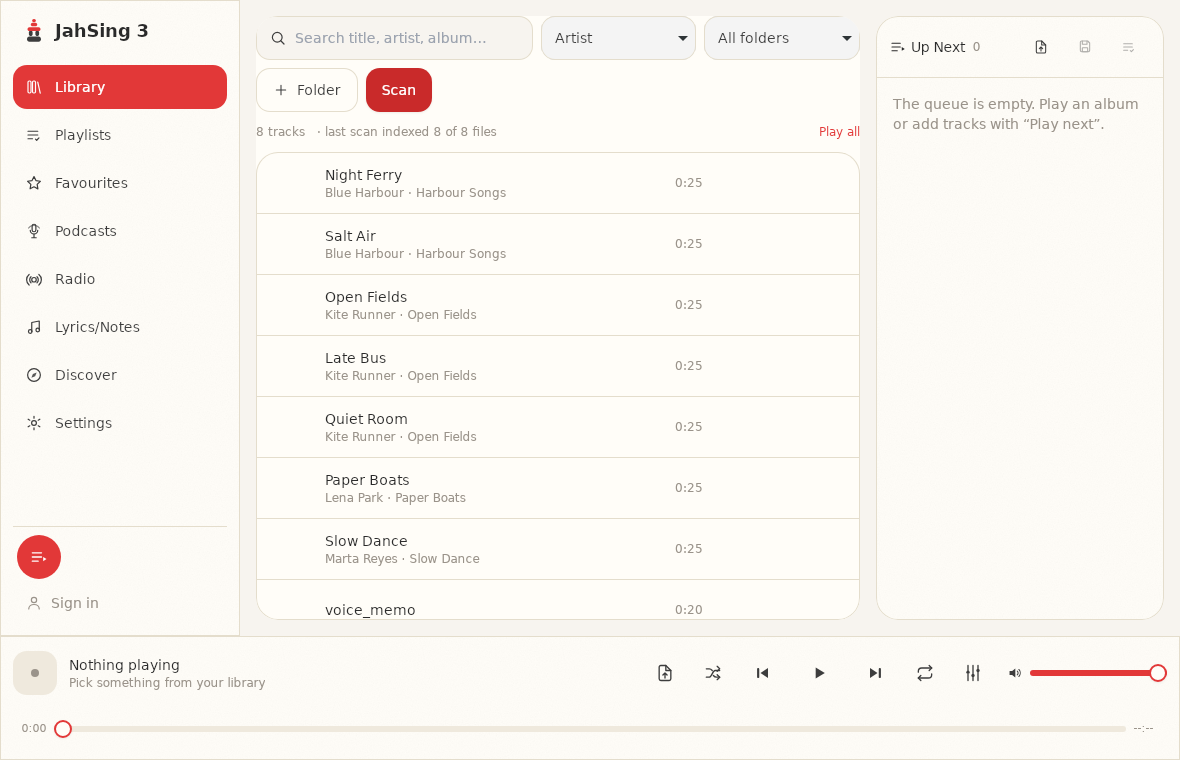
When you press the Folder button on the Library page and pick a folder, JahSing 3 adds it as a source. A source is simply a folder that the library remembers and reads from. You can add as many as you like, and each one keeps its own name in the list. Songs from every source live together in one library, so a search covers everything, but you can also narrow the view to one source with the folder menu.
Importantly, your files stay where they are. JahSing 3 does not copy or move them. You can arrange your folders however you like on disk, and the library follows.
Step 1: Plan your folders
Before adding anything, take a minute to decide what belongs together. A few layouts that work well:
- By origin: “Old CDs” (your rips), “Purchased downloads,” “Gifts and shared files.”
- By quality: “Lossless,” “Compact MP3s.” This is handy if you keep a lossless master collection and a smaller one for devices.
- By use: “Music,” “Podcasts you saved,” “Audiobooks,” “Sound effects.”
- By person: a separate source for each family member sharing a computer.
Pick one scheme and stick with it. A simple rule of thumb: if you would want to look at a group of songs on its own, it deserves its own folder.
Step 2: Add each folder
- Open the Library page.
- Press Folder. Your computer’s folder chooser opens.
- Pick the first folder and confirm.
- Repeat for each additional folder.
- Press Scan. JahSing 3 reads the songs in every folder and adds them to the library.
After the scan, the line near the top of the list tells you how many songs were indexed out of how many files were seen.
Step 3: Use the folder menu
Once at least one folder has been added, a menu appears next to the sort menu. It starts on “All folders.” Open it and you see each source by name. Choose one, and the list shows only songs from that folder.
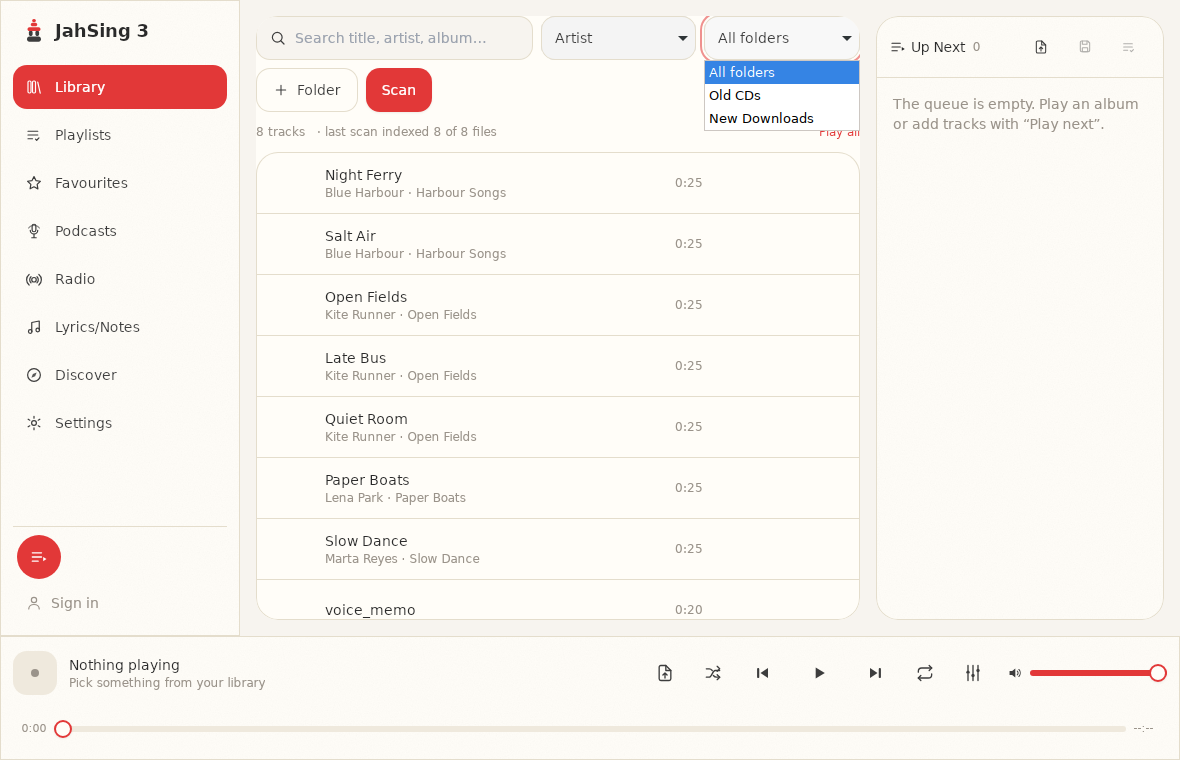
This combines with search and sorting. For example, choose “New Downloads,” switch the sort to “Recently added,” and you get a tidy list of what you picked up lately. Or choose “Old CDs” and search for an artist to see only your old rips of their albums.
What the folder menu is good for
- Listening by mood or era: pick “Old CDs” when you want the nostalgic stuff.
- Checking a new batch: after downloading an album, look at “New Downloads” only, and fix its tags before it mixes in with everything else.
- Finding duplicates: if you suspect you have the same album twice, look at each source in turn and compare.
- Troubleshooting: if a scan reports problems, narrow down which folder holds the odd files.
Mixing formats across folders
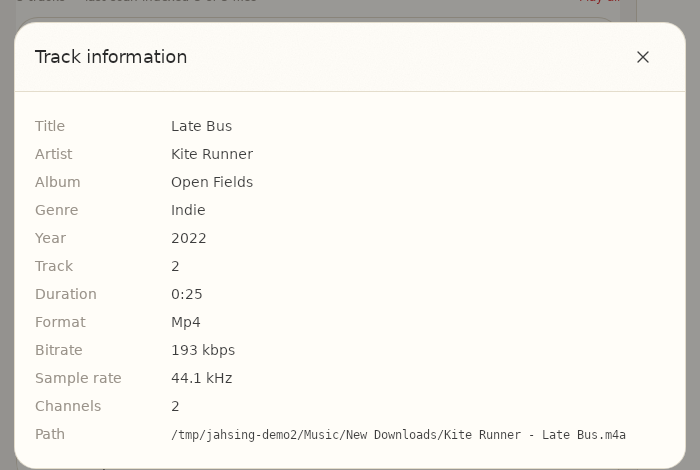
Different sources often mean different file types. In our sample library, the “Old CDs” folder holds FLAC and MP3 files, while “New Downloads” holds Ogg Vorbis, M4A, WAV and MP3 files. JahSing 3 plays them all with no special setup. If you want to know what a given song is, add it to the queue and open its Information window. That window shows the format, bitrate and the full file path, which also tells you which folder the song lives in.
Keeping it tidy over time
- Add new music to the right folder, then scan. New songs appear in the list after a scan.
- Sort out new arrivals quickly. A “Downloads” folder with untagged files is the main source of mess. Use the Edit tags button to fix titles and artists, then (if you like) move the files to their permanent home.
- Be careful with moves. The library remembers where files were when they were scanned. If you move a folder to another drive, add it in its new location and scan again.
What about network drives and external disks?
The app’s welcome text says a mounted network share works as a source, as long as your computer can open it like an ordinary folder. External disks work in the same way. The songs will only be available while the disk or share is connected, and scanning over a network is slower than scanning a local drive. A sensible approach is to keep your everyday favorites on the main computer and the large archive on the external disk.
A worked example
Suppose you have a folder of CD rips from the 1990s, a folder of downloads from this year, and a folder of your own band’s rehearsal recordings.
- Add all three folders. Name them clearly on disk, such as “CD Rips,” “Downloads 2026” and “Rehearsals,” so they are easy to tell apart in the menu.
- Scan once and check that the numbers match what you expect.
- Use “All folders” for everyday listening and search.
- Switch to “Rehearsals” when you want to review a recording, and back again afterward.
- Fix tags in “Downloads 2026” as you listen.
A few minutes of setup gets you a library that reads the way you think.
You can download JahSing 3 from the Downloads page. For more on keeping a collection healthy, see our guide to setting up your library.
Sources: JahSing Features; the JahSing 3 app itself, tested with sample folders created for this article.