How to Set Up Your Music Library in JahSing 3 in 10 Minutes
You have downloaded JahSing 3 and opened it for the first time. Now what? The first screen is empty, because the player does not know where your music is. This guide walks through the whole setup, from adding a folder to checking that everything arrived, in about ten minutes. No technical knowledge is needed.
Before you start: find your music
JahSing 3 works from folders on your computer. It does not copy or move your songs. It reads them where they are and builds its own index. So the first job is to know where your music lives. Common places are:
- The Music folder in your user area.
- A folder of downloads, or one you made for ripped CDs.
- An external hard drive or a USB stick (plug it in first).
- A shared folder on another computer or a network drive, if it is available from your computer as a normal folder. The app’s own welcome text says a “mounted network share” works too.
If your music is spread across several places, that is fine. You can add more than one folder.
Step 1: Open the Library page
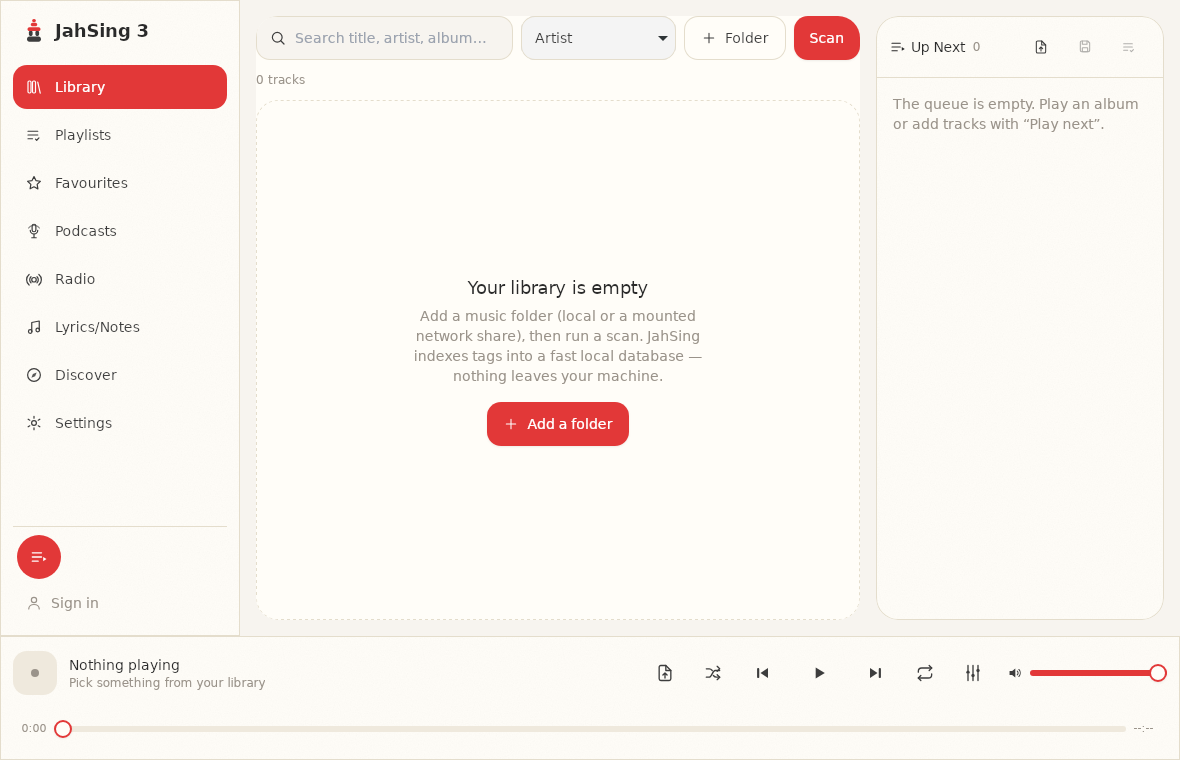
The Library page is the first item in the list on the left. With a brand new install, it tells you the library is empty and offers a button to add a folder. The message says JahSing indexes song details into a fast local database and that nothing leaves your machine.
Step 2: Add a folder
Press the Folder button (or “Add a folder” on the empty page). Your system’s normal folder chooser opens. Pick the folder that holds your music and confirm. Choose the top-level folder, such as “Music,” rather than one single album, and JahSing 3 will look inside everything below it too.
If you have more than one location, repeat this step for each one. Each folder you add is kept as a “source.”
Step 3: Press Scan
The red Scan button tells JahSing 3 to look through your folders and read each song. For a few hundred songs it takes seconds. For tens of thousands, give it a few minutes the first time, and let it finish before you judge the result.
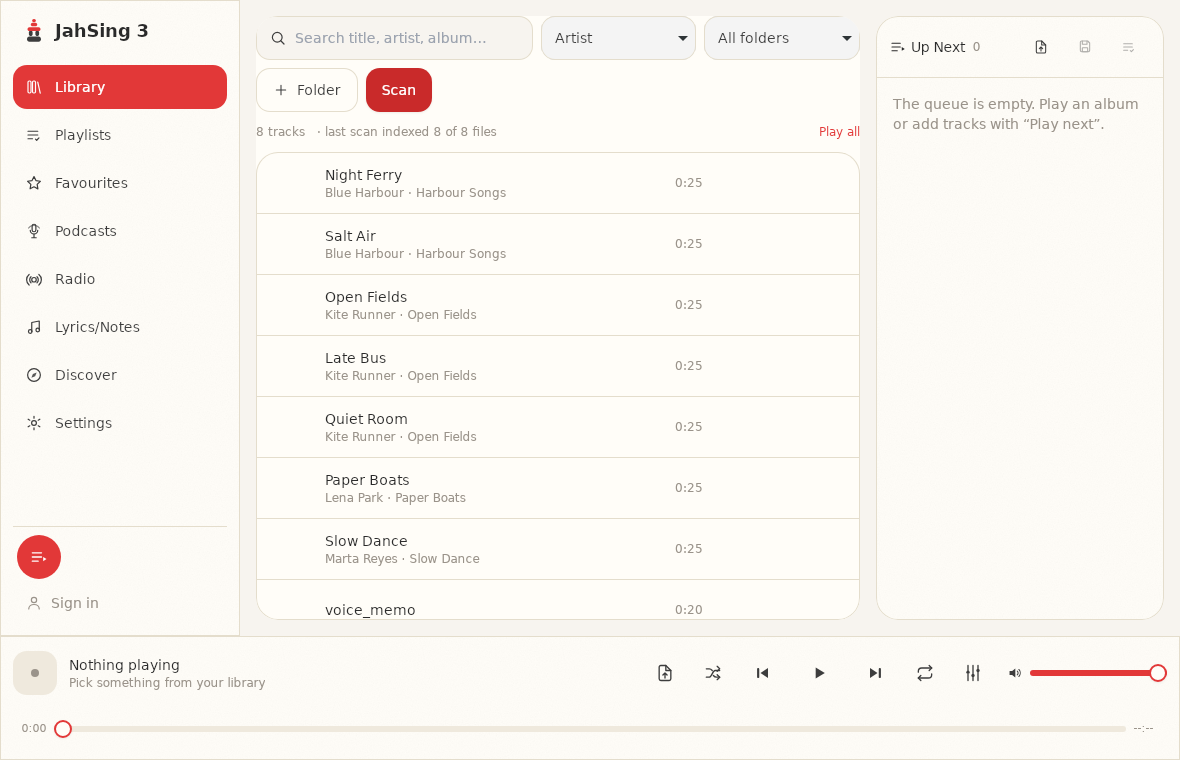
When the scan finishes, you will see a line near the top of the list that says how many tracks are in the library, and how many files the last scan looked at. In the sample library below it reads “8 tracks” and “last scan indexed 8 of 8 files.”
Step 4: Check the numbers
That “indexed X of Y files” line is your friend. It tells you how many files the scan found, and how many it could read as music. If the two numbers are different, some files were skipped. Common reasons are files that are not music at all (pictures, text files) or files the player cannot read, such as damaged files. If the scan hit errors, the line mentions how many.
Step 5: Have a look around
Now spend two minutes exploring:
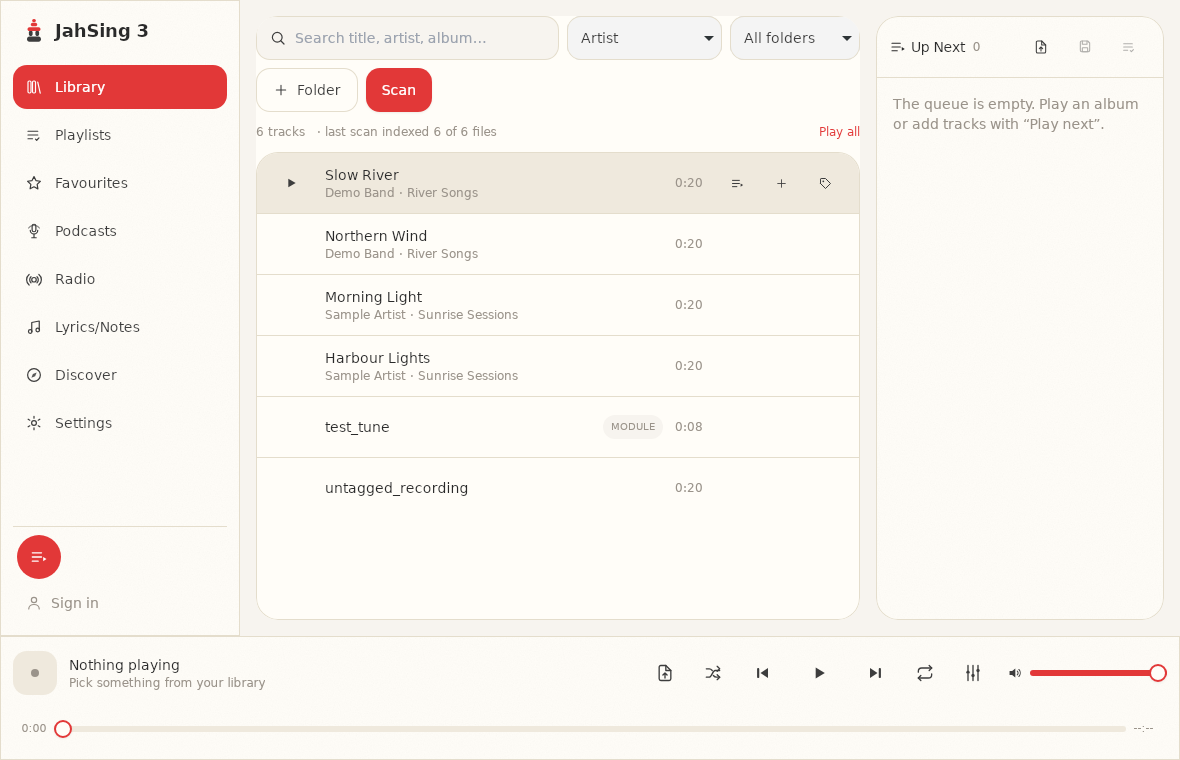
- Hover over a song. Four small buttons appear on the right: Play, Play next, Add to queue and Edit tags.
- Try the search box. Type part of a title, artist or album name. The list narrows as you type.
- Use the sort menu. It can order the list by artist, by title or by when songs were added.
- Look at the folder menu. Once you have added folders, a menu appears that lets you view a single folder or all of them.
Step 6: Fix anything that looks odd
Most libraries have a few untidy spots on day one. A song with no title, or one filed under “Unknown artist,” usually has missing tags. The Edit tags button on each row lets you fix the title, artist, album, genre, year and track number. If there is a lot to fix, our guide to fixing missing tags and album art shows how to work through them efficiently.
Step 7: Decide about video
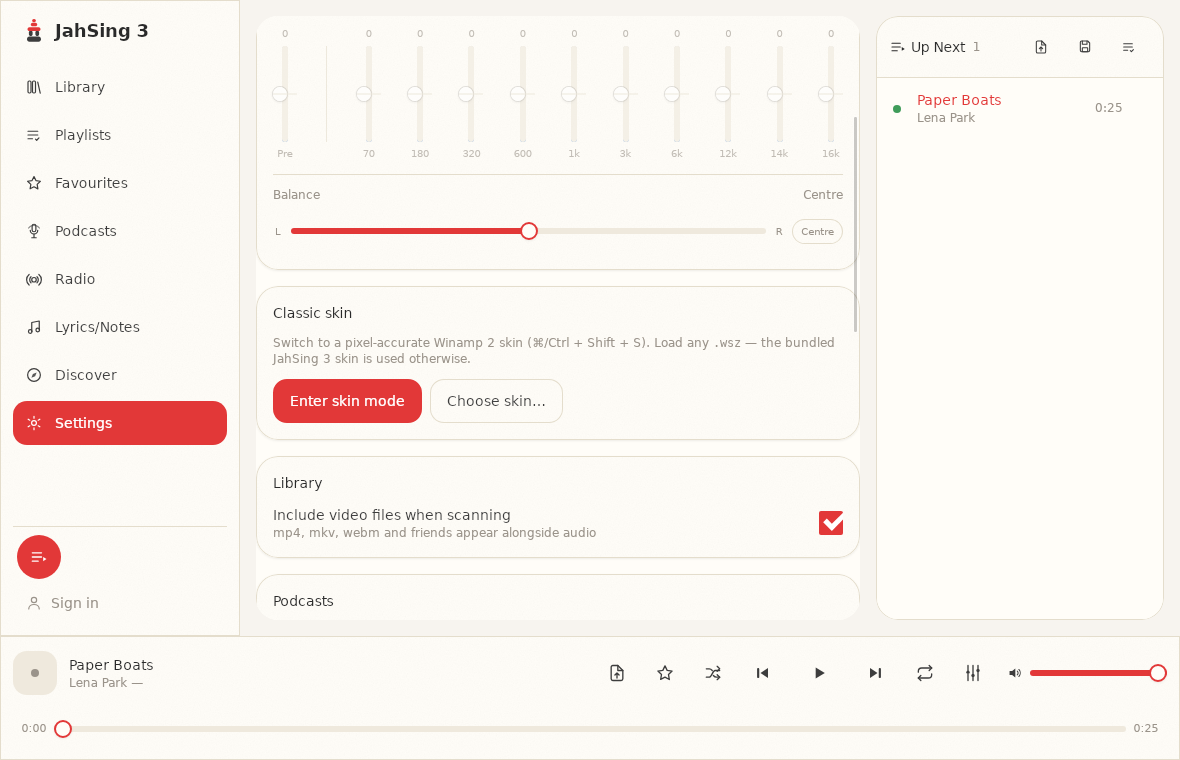
JahSing 3 can scan for video files as well as audio, and the Settings page has a checkbox labelled “Include video files when scanning.” The text beside it says that mp4, mkv, webm and similar files will appear alongside your audio. If your music folders also hold home movies, you may or may not want them in the list. Change the setting if needed, then scan again.
Step 8: Keep it up to date
When you add new music to a folder, press Scan again and the new songs will be added to the index. You do not need to start over, and your existing entries are updated rather than duplicated.
Common first-day questions
Will JahSing 3 change or move my files? No. Scanning only reads them. The only time a file changes is if you edit its tags in the tag editor and save.
Where does the index live? In a small database in the app’s own data area on your computer. Nothing is sent anywhere.
What if I move my music folder later? The index points to where the files were. After a move, add the new folder and scan again. It is a good reason to settle on a folder layout before you build playlists.
Can I use a network drive? Mounted network shares, external NAS or remote shares all can be used. Scanning will be slower over a network, and the songs will not be available when the drive is offline.
Does it show album covers? Cover art that is stored inside your song files is read by JahSing 3. Songs with no picture inside them simply show a plain placeholder.
You are done
That is all it takes: add a folder, scan, check the count, and explore. From here you can build a queue, make playlists and mark favorites. If you have not installed JahSing 3 yet, you can get it from the Downloads page.
Sources: JahSing Features; JahSing Installation Help.